Upgrading orcharhino Proxy
This guide describes how to upgrade an orcharhino Proxy to a newer version.
orcharhino is a large software suite undergoing active development. It is necessary to upgrade orcharhino when ATIX releases new versions to take advantage of its new features and bug fixes. Refer to the orcharhino Release Notes for more information.
ATIX provides guided upgrades performed by our consultants as part of our support subscriptions. Please contact us if you would like to make use of this service.
|
Ensure you carefully read all of the instructions, warnings, and recommendations presented in this guide and the appropriate version specific orcharhino Upgrade Notes in the ATIX Service Portal. ATIX does not offer support for recovery from a failed upgrade if you did not follow our upgrade guide. |
Version specific upgrade instructions are published in the ATIX Service Portal. Log in with your ATIX Support login credentials and follow the link to the orcharhino Upgrade Notes. Ensure you carefully read the version specific instructions before starting the upgrade and always create a snapshot/backup as part of your upgrade.
If you are skipping versions in a single upgrade, read all of the version specific instructions for all intermediary versions. For example, if you are upgrading from orcharhino 5.10 to 5.12, read both the instructions for the upgrade to version 5.11 and 5.12. Please contact us if you are unsure on how to start with your orcharhino upgrade.
|
ATIX AG does not support using third party repositories on your orcharhino Server or orcharhino Proxies. Resolving package conflicts or other issues due to third party or custom repositories is not part of your orcharhino support subscription. Please contact us if you have any questions. |
Providing Content for orcharhino Proxy
orcharhino Proxies obtain their content, which is identical to the packages for orcharhino Server, from the orcharhino Server they are connected to.
You can use a script to provide content for orcharhino Proxies.
Run /opt/orcharhino/automation/play_orcharhino_proxy_content.sh on your orcharhino Server to automatically create the Smart Proxy Atix product, include the repository in the content view, and publish a new version of the content view.
You can configure the script using /etc/orcharhino-ansible/or_orcharhino_proxy_content_vars.yaml.
-
Navigate to Content > Products and create a product named
Smart Proxy Atix. -
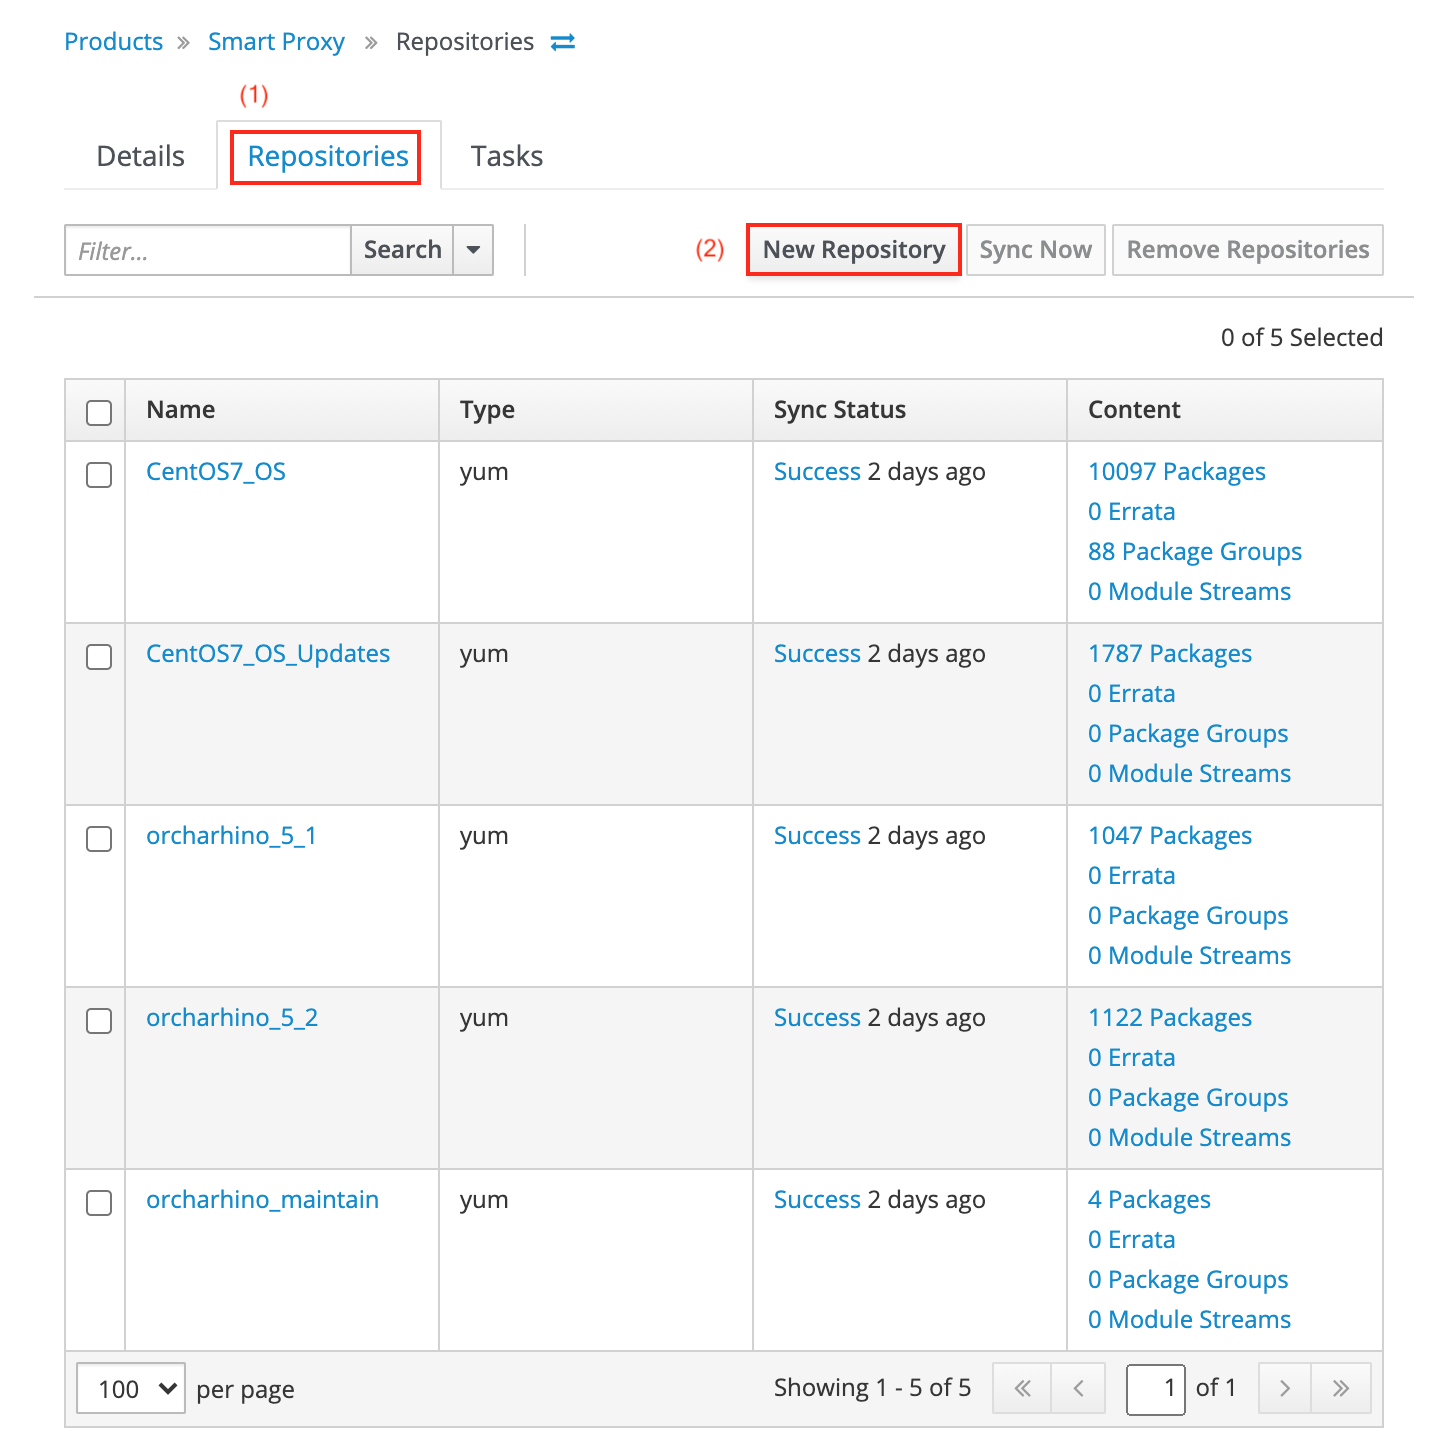
Navigate to Content > Products, select the Smart Proxy Atix product, and add a repository of type yum. On the Repositories tab (1), click the New Repository button (2):

Add the latest repository as found on your orcharhino Servers in
/etc/yum.repos.d/redhat.repo. -
Navigate to Content > Content Views, select the content view of the orcharhino Proxy, and add the latest repository.
-
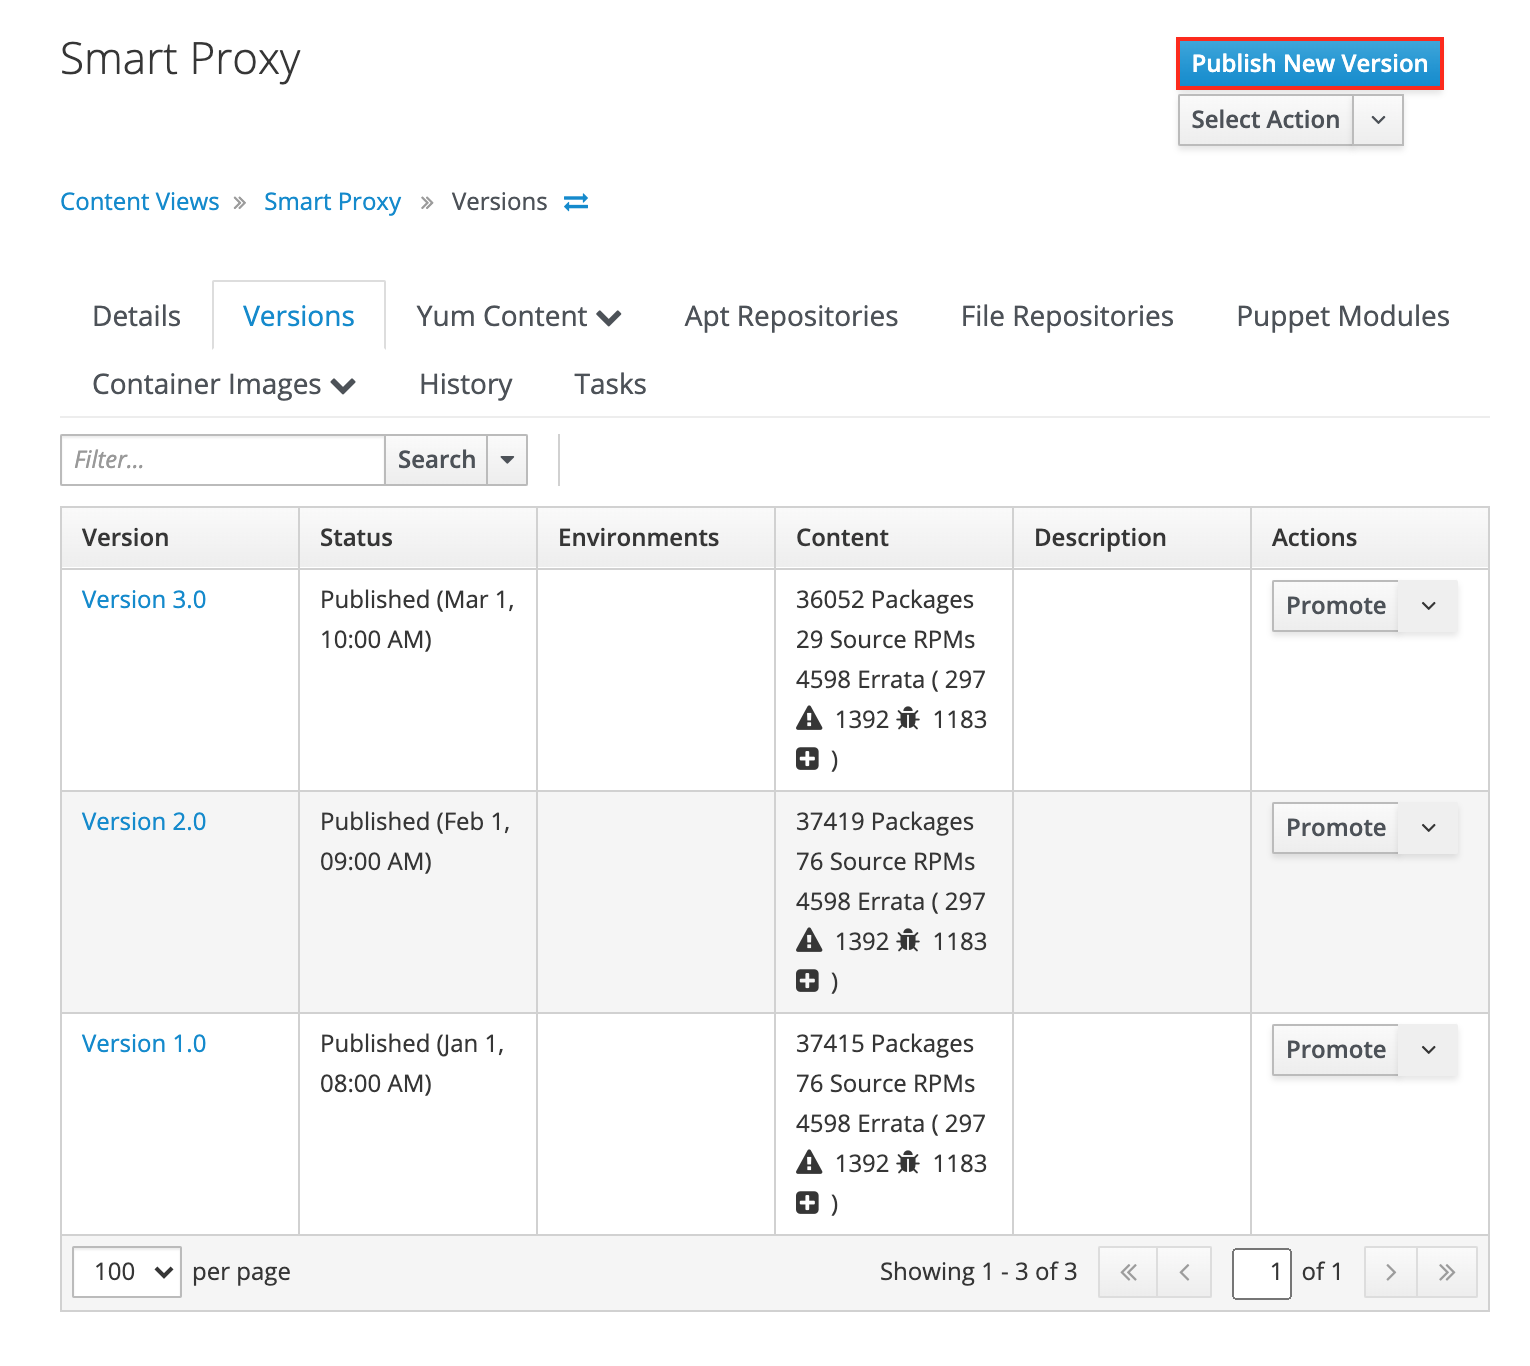
Navigate to Content > Content Views, select the content view of the orcharhino Proxy, and publish a new version.

Click Publish New Version to publish a new version of the content view for your orcharhino Proxy.
Performing the Upgrade
-
You have prepared content for orcharhino Proxy on your orcharhino.
-
You have a one time SSH connection to your orcharhino Proxy.
-
Ensure that you have enabled the required DNF modules on your orcharhino Proxy. For more information, see Installing the orcharhino Proxy Packages in Installing orcharhino Proxy.
-
Verify that the repositories on orcharhino Server are also available on your orcharhino Proxy by running the following command on your orcharhino Proxy:
$ dnf repolist -
Enable DNF module hotfixes for your orcharhino Proxy repository:
$ subscription-manager repo-override \ --add module_hotfixes:1 \ --repo ATIX_Smart_Proxy_Atix_ATIX_orcharhino_Server_EL8_orcharhino_6_6 -
Update all packages on your orcharhino Proxy:
$ dnf update -
Install the
orcharhino-proxypackage on your orcharhino Proxy:$ dnf install orcharhino-proxy -
Upgrade your orcharhino Proxy:
$ orcharhino-installer
Migrating Managed Hosts from orcharhino Proxy to Another orcharhino Proxy
There are several aspects you have to keep in mind if you plan to migrate managed hosts from orcharhino Server or orcharhino Proxy to another orcharhino Proxy. The procedure depends on your IT infrastructure and your orcharhino setup. If you are unsure how to do this, please contact us.
In general, we recommend updating your orcharhino Proxies. If you want to deploy new orcharhino Proxies instead, ensure you keep the following in mind:
-
Register your managed hosts to your orcharhino Proxy. You have to change the certificates for
subscription-managerand re-register your host with your target orcharhino Proxy. -
If you configure your managed host using Puppet or Salt, you need to change the respective orcharhino Proxy for Puppet Proxy or Salt Master.
-
If your managed host relies on orcharhino Proxy for DNS, you need to change the DNS on your managed host.
-
If your orcharhino Proxy acts as Puppet Master or Salt Master, you need to copy the Puppet or Salt certificates to your target orcharhino Proxy.
-
If you rely on configuration management objects such as Ansible roles, Puppet modules, or Salt states, you have to copy them to your target orcharhino Proxy. For more information, see Synchronizing Configuration Management Objects.
-
If your orcharhino Proxy provides DHCP and/or DNS for its subnet, ensure to migrate all DHCP and/or DNS entries to your target orcharhino Proxy.
-
By design, each orcharhino Proxy has its own SSH key pair. If you configure managed hosts using Ansible through your orcharhino Proxy, you have to migrate the used SSH key to your target orcharhino Proxy.