Amazon EC2
EC2 is a cloud computing service by Amazon. It is one of the compute resource providers supported by orcharhino.
Installing EC2
Install the foreman-ec2 package to attach an EC2 compute resource provider to orcharhino.
This allows you to manage and deploy hosts to EC2.
Run the following command on your orcharhino to install the EC2 compute resource provider:
# foreman-installer --enable-foreman-compute-ec2Go to Administer > About and select the compute resources tab in the orcharhino management UI to verify the installation of the EC2 compute resource plugin.
Creating an EC2 Compute Resource
The create compute resource page can be accessed via the Create Compute Resource button:
Infrastructure > Compute resources >> Create Compute Resource
|
Clicking the Create Compute Resource button does not actually create a new compute resource, rather it serves to attach a preexisting compute resource to the list of known compute resources to orcharhino. |
When adding a compute resource provider to orcharhino, you must provide a name, select the relevant provider, and enter any provider specific connection information.
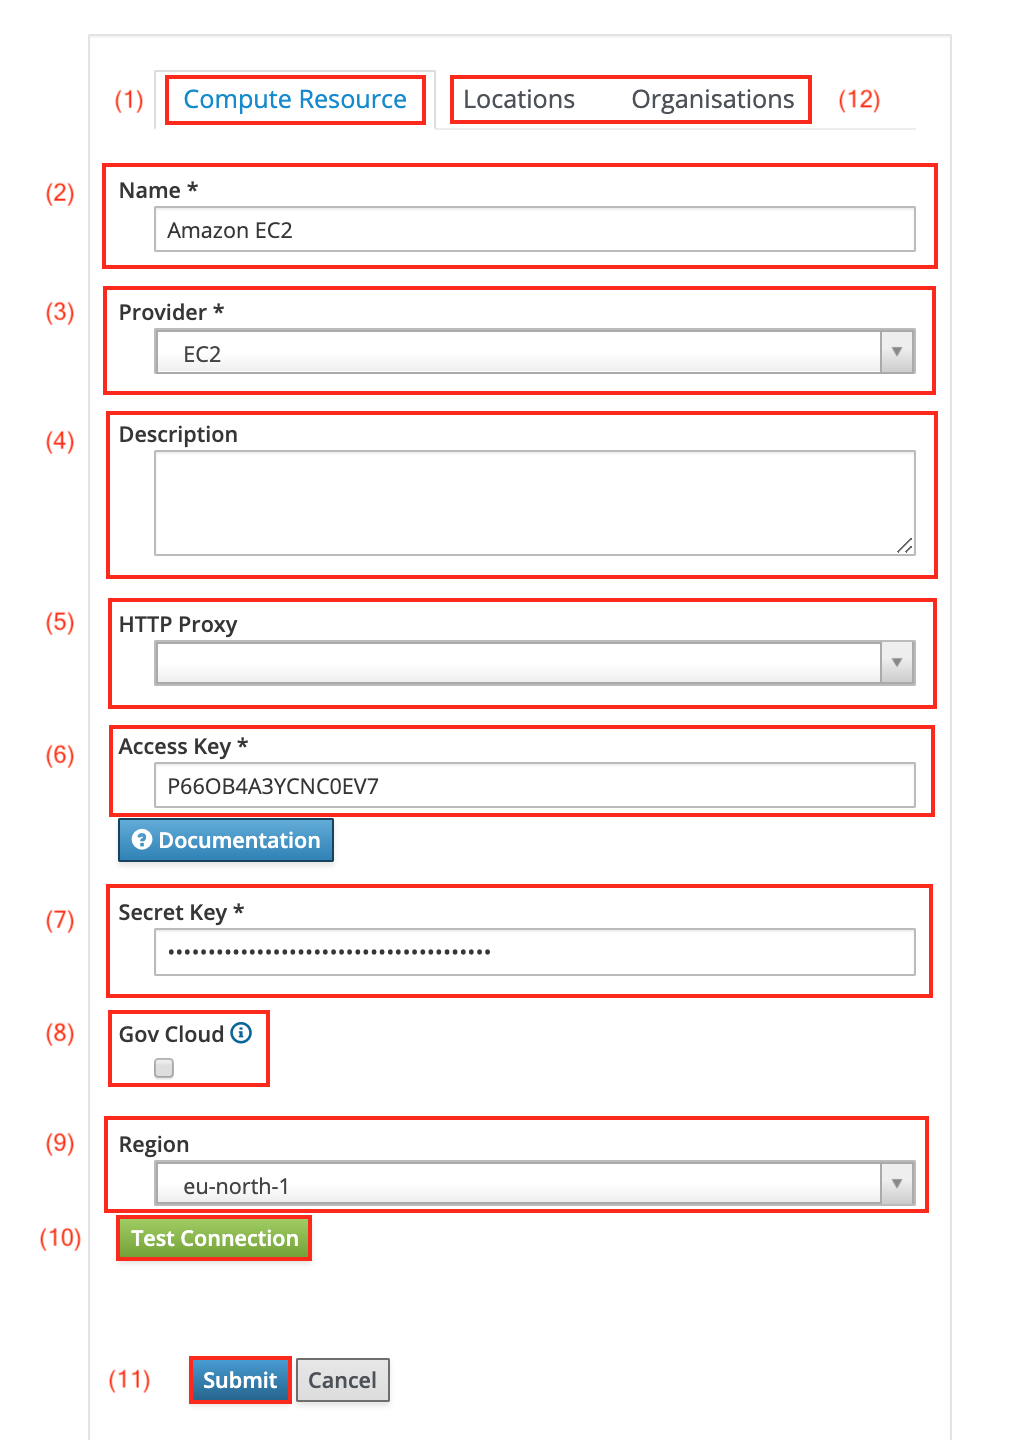
Enter the following information to add EC2 as a compute resource:
-
The Compute Resource tab (1) collects all information necessary to attach EC2 as a compute resource provider to orcharhino.
-
The Name field (2) displays the name of the compute resource provider.
-
Select EC2 from the Provider drop down menu (3). Now, EC2 specific additional provider fields appear.
-
You may also add an arbitrary Description (4) to your compute resource.
-
The HTTP Proxy drop down menu (5) lets you optionally use a proxy to connect to the compute resource.
-
The Access Key (6) and Secret Key (7) can be obtained from within your Amazon AWS account.
-
The Gov Cloud checkbox (8) is only relevant for us-american government agencies in order to comply with regulations.
-
The Region drop down menu (9) lets you select the geographical region hosts will be located in.
-
You can verify your input by clicking the Test Connection button (10). orcharhino will signal if a connection to EC2 with the information you provided is successful.
-
Click Submit (11) to save the EC2 configuration on your orcharhino.
-
Remember to assign a Location and Organization (12) context on the corresponding tabs.
Editing an EC2 Compute Resource
The edit compute resource page can be accessed via the list of compute resources:
Infrastructure > Compute resources >> list of compute resources > Actions column > Edit
The edit compute resource page is essentially the same as the create compute resource page, with the difference that fields will be prefilled with the settings of the compute resource being edited.
Viewing an EC2 Compute Resource
-
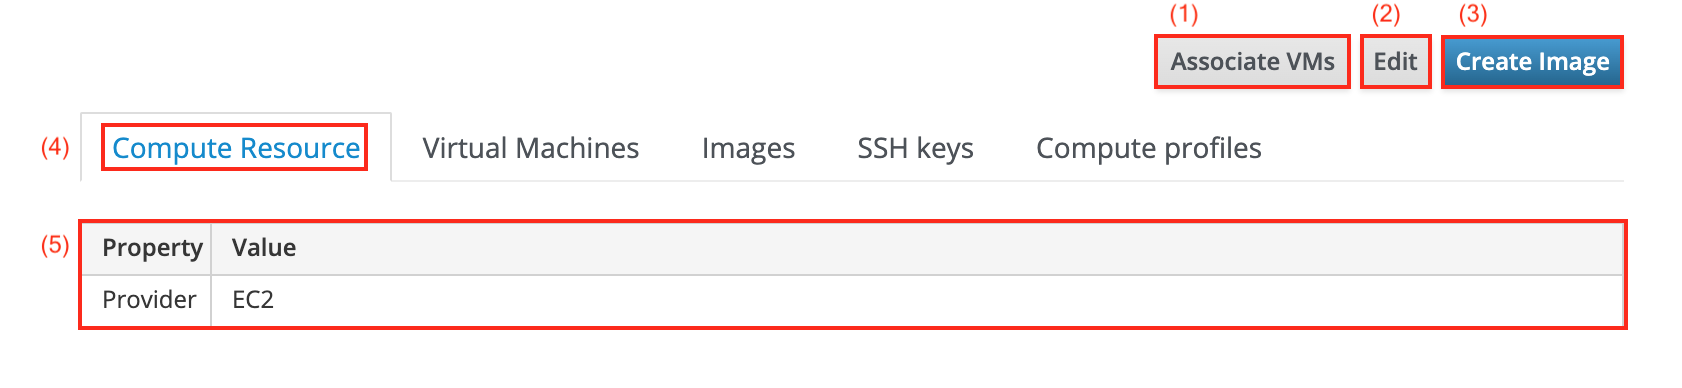
The Associate VMs button (1) will reassociate hosts that are in a disassociated state. This mostly happens when hosts are manually disassociated via the all hosts page.
-
The Edit button (2) takes you to the edit compute resource page for the compute resource being viewed.
-
The Create Image button (3) takes you to the create compute resource image page.
-
The Compute Resource tab (4) shows some basic information about the compute resource in question.
-
You can view general details of the selected compute resource in a table (5).
-
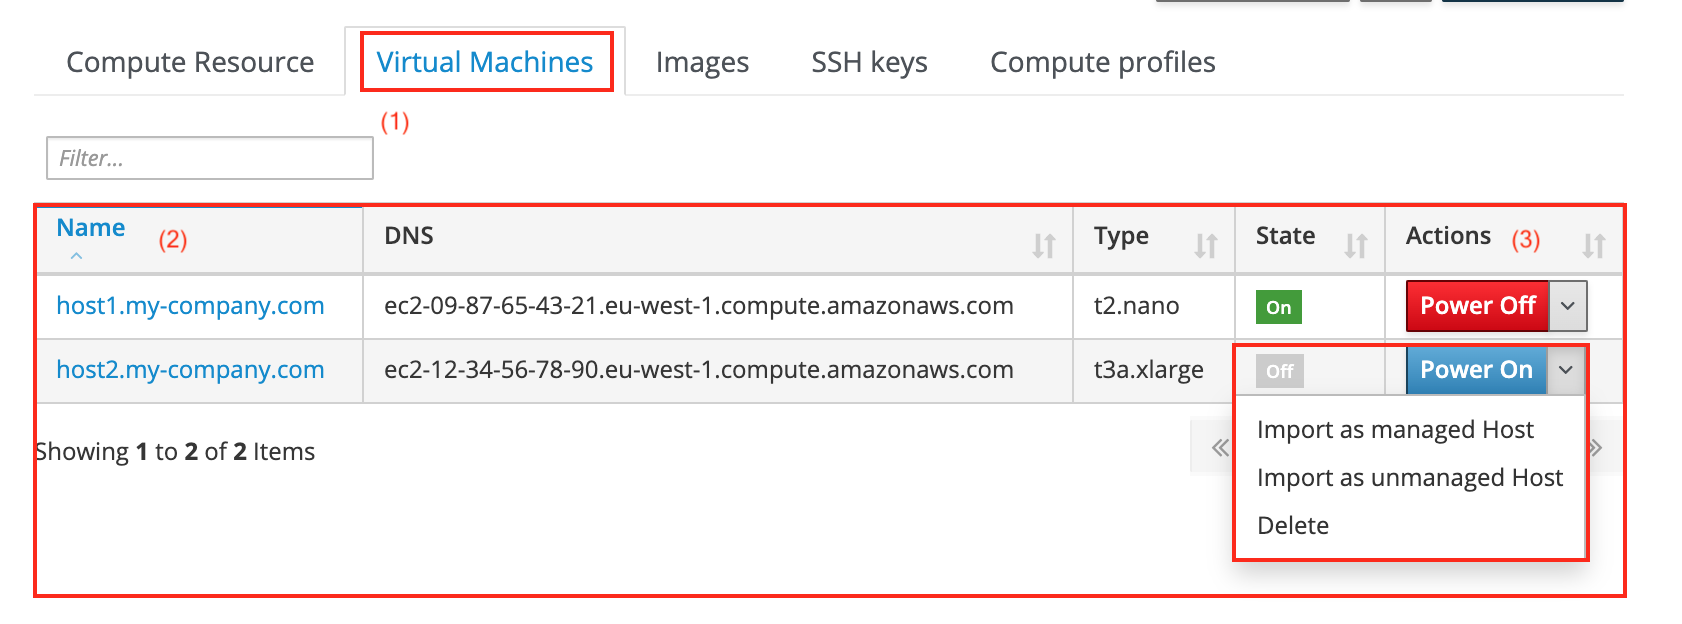
Selecting the Virtual Machines tab (1) displays all virtual machines running on the selected EC2 compute resource provider, irrespective of whether they are associated with an orcharhino host or not.
-
A table (2) lists all machines by name with additional information such as DNS, type, and whether they are currently powered on or not.
-
Selecting Power On or Power Off in the Actions column (3) will change the power state of the virtual machine in question.
-
Selecting Import as managed Host will import the virtual machine to orcharhino. Managed indicates that hosts will receive provisioning and configuration management as well as return reports to orcharhino.
-
Selecting Import as unmanaged Host lets you also import a virtual machine to orcharhino. Unmanaged indicates that orcharhino will only handle configuration management and receive reports from hosts.
-
Click Delete to delete the virtual machine in question.
-
-
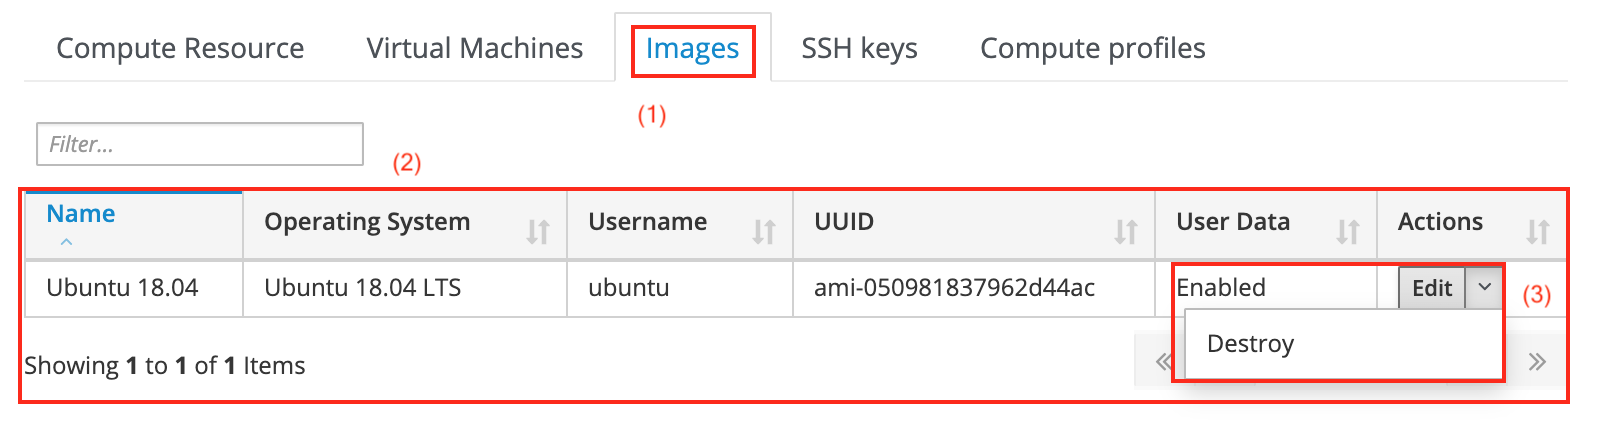
Navigating to the Images tab (1) takes you to the list of EC2 images.
-
The list of images contains the Name (2) and operating system amongst other information.
-
The Action menu (3) lets you edit and destroy images from orcharhino, but not from the underlying hypervisor.
-
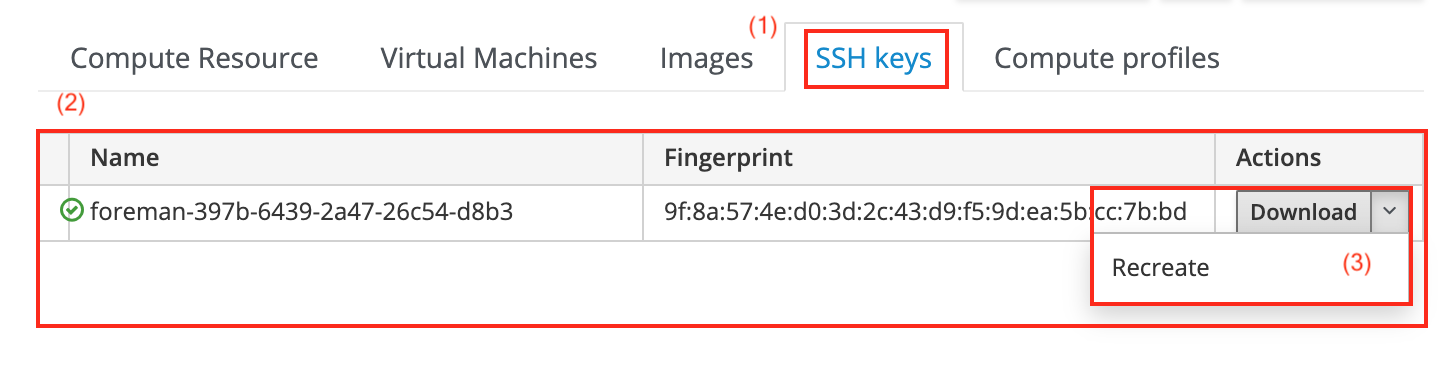
Navigating to the SSH keys tab (1) takes you to the list of SSH keys.
-
The list of SSH keys (2) contains the name and fingerprint of each SSH key.
-
The Action menu (3) lets you download the SSH public key or recreate an SSH key pair.
-
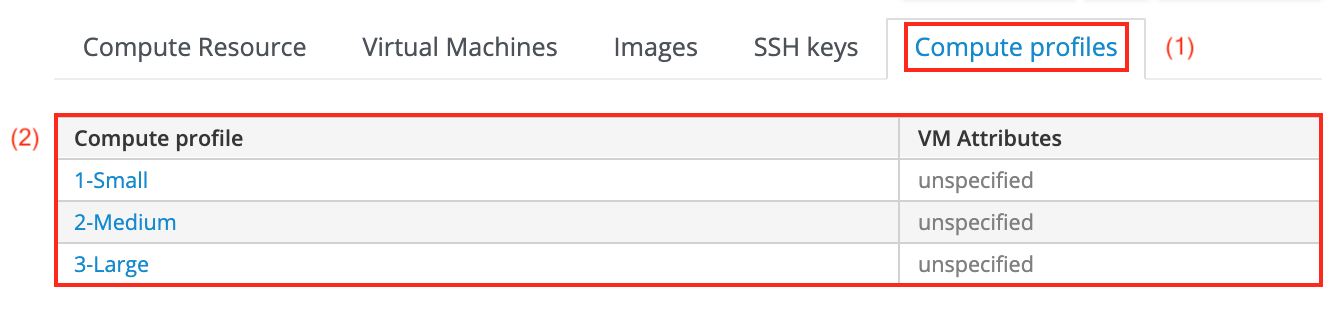
Selecting the Compute profiles tab (1) lists all available compute profiles for EC2.
-
The table (2) displays the existing compute profiles for EC2 and their corresponding VM attributes, which are unspecified in the screenshot above so far.
Viewing an EC2 Virtual Machine
The virtual machine overview page can be accessed via the Virtual Machines tab on the compute resource overview page running the virtual machine:
Infrastructure > Compute resources >> list of compute resources > name of a compute resource > Virtual Machines tab > name of a virtual machine
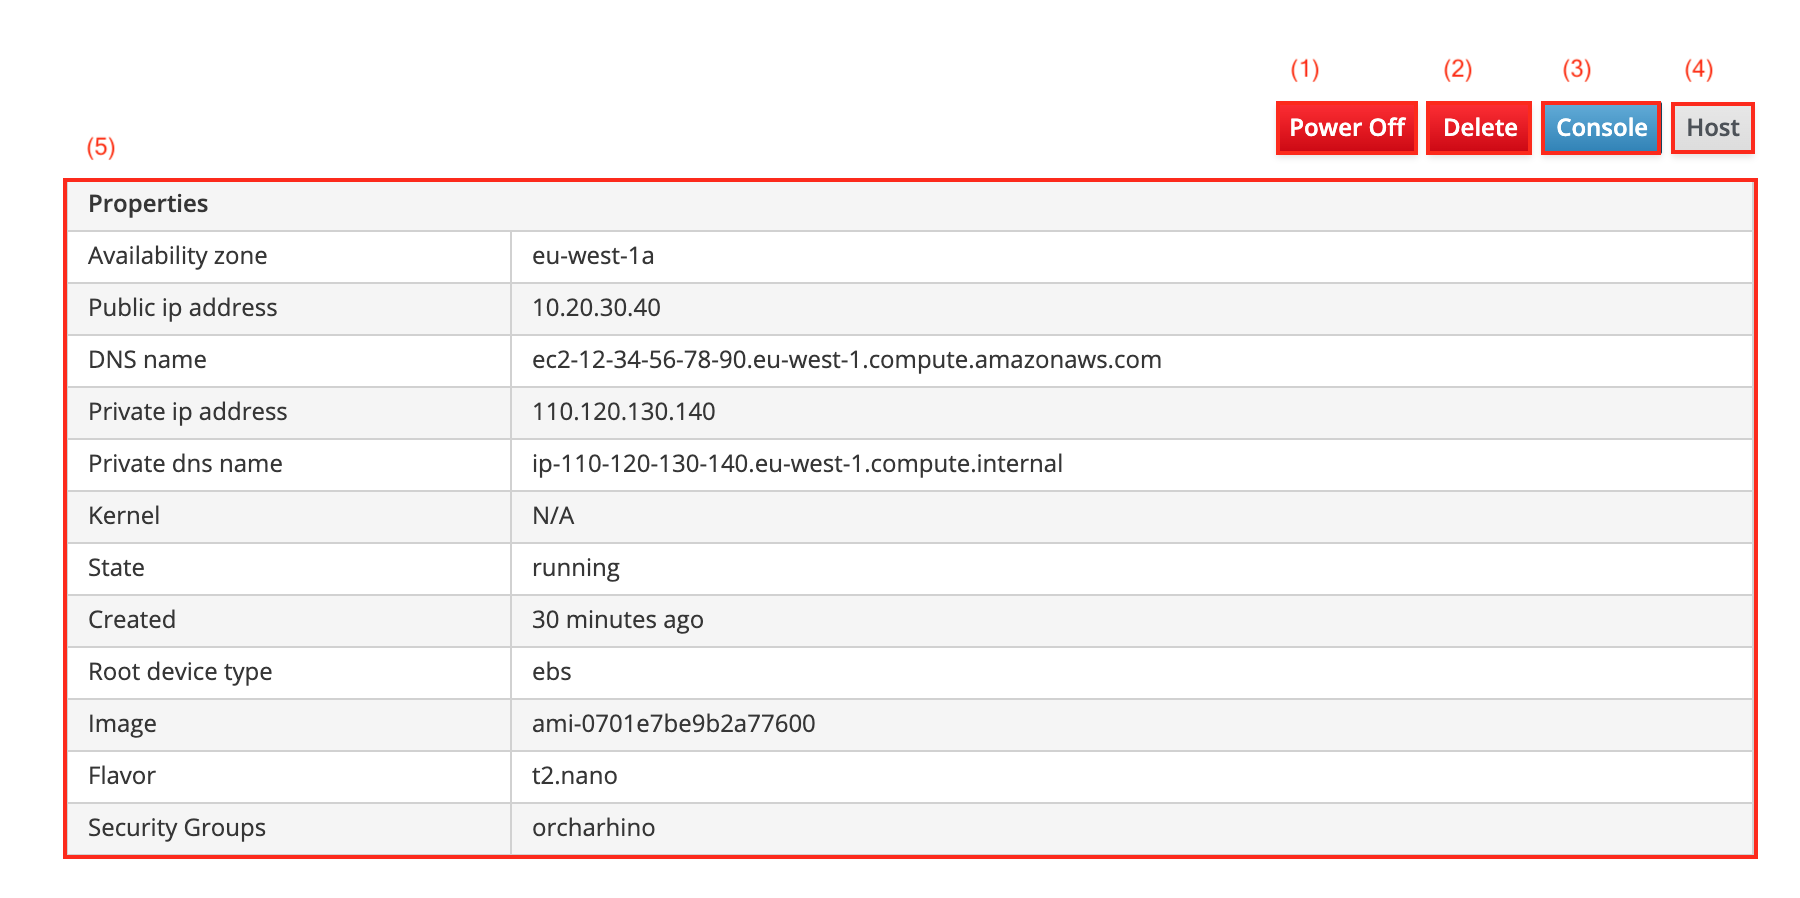
The virtual machine overview page displays information about the relevant virtual machine and includes a number of buttons to perform actions relating to it:
-
The Power Off button (1), or, for that matter, Power On button, will change the power state of the virtual machine in question.
-
The Delete button (2) will delete the virtual machine from the EC2 compute resource while retaining any associated orcharhino hosts. If you want to delete the orphaned host, navigate to Hosts > All Hosts and delete the host manually.
-
There is currently no way to gain browser based console access by clicking the Console button (3) for the EC2 compute resource.
-
The Host button (4) takes you to the host overview page.
-
The list of Properties (5) displays various properties of the EC2 virtual machine.
Creating an EC2 Image
The create image page can be accessed via the compute resource overview page:
Infrastructure > Compute resources >> list of compute resources > name of a compute resource > Create Image button
The create image page looks as follows:

-
The Name (1) field lets you assign a meaningful and unique name to the new EC2 image, that is describing the kind of host that is to be provisioned from the image.
-
The Operating System drop down menu (2) lets you associate the image to an orcharhino operating system.
-
Associate the correct architecture of the image to orcharhino in the Architecture drop down menu (3).
-
The Username field (4) refers to the user needed to SSH into the machine.
-
The Image ID (5) refers to the Amazon machine images ID. This ID can be found within Amazon AWS or on operating system specific pages like debian.org or ubuntu.com.
-
You may enable support for user data input by checking the User Data checkbox (6).
-
You may optionally set an Iam Role (7) for Fog to use when creating this image.
-
Click Submit (8) to save the changes to orcharhino.
Ensure the operating system and architecture fields match the operating system and architecture found in the template being created.
Editing an EC2 Image
The edit image page can be accessed via the Images tab on the compute resource overview page:
Infrastructure > Compute resources >> list of compute resources > name of a compute resource > Images tab > Actions column > Edit
The edit image page is essentially the same as the creating an image page, with the difference that fields will be prefilled with the settings of the image being edited.
Editing an EC2 Compute Profile
The edit compute profile page can be accessed via the list of compute profiles:
Infrastructure > Compute profiles >> list of compute profiles > name of a compute profile
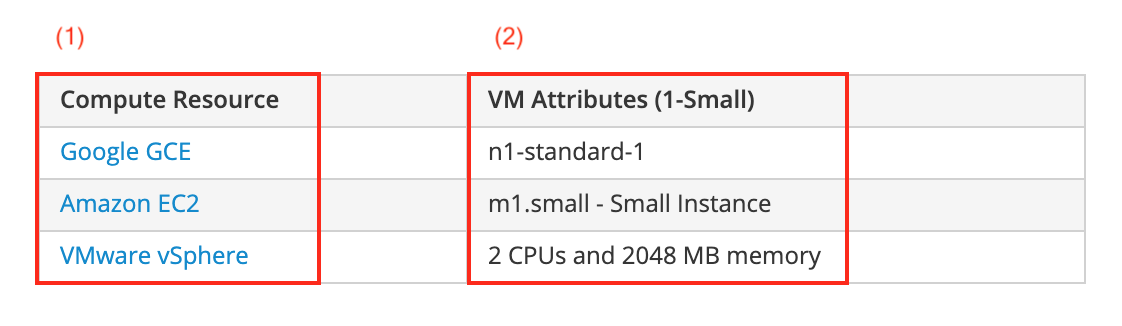
This page displays a list of compute attribute sets, one for each compute resource known to orcharhino:
-
The Compute Resource column (1) lists all available compute resource providers.
-
The VM Attributes (1-Small) column (2) lists various attributes for virtual machines of type 1-small. The example shown above assigned EC2’s flavour m1.small to the 1-small compute profile.
Clicking on the name of a compute resource in the left column opens the edit compute attributes page for that compute resource:
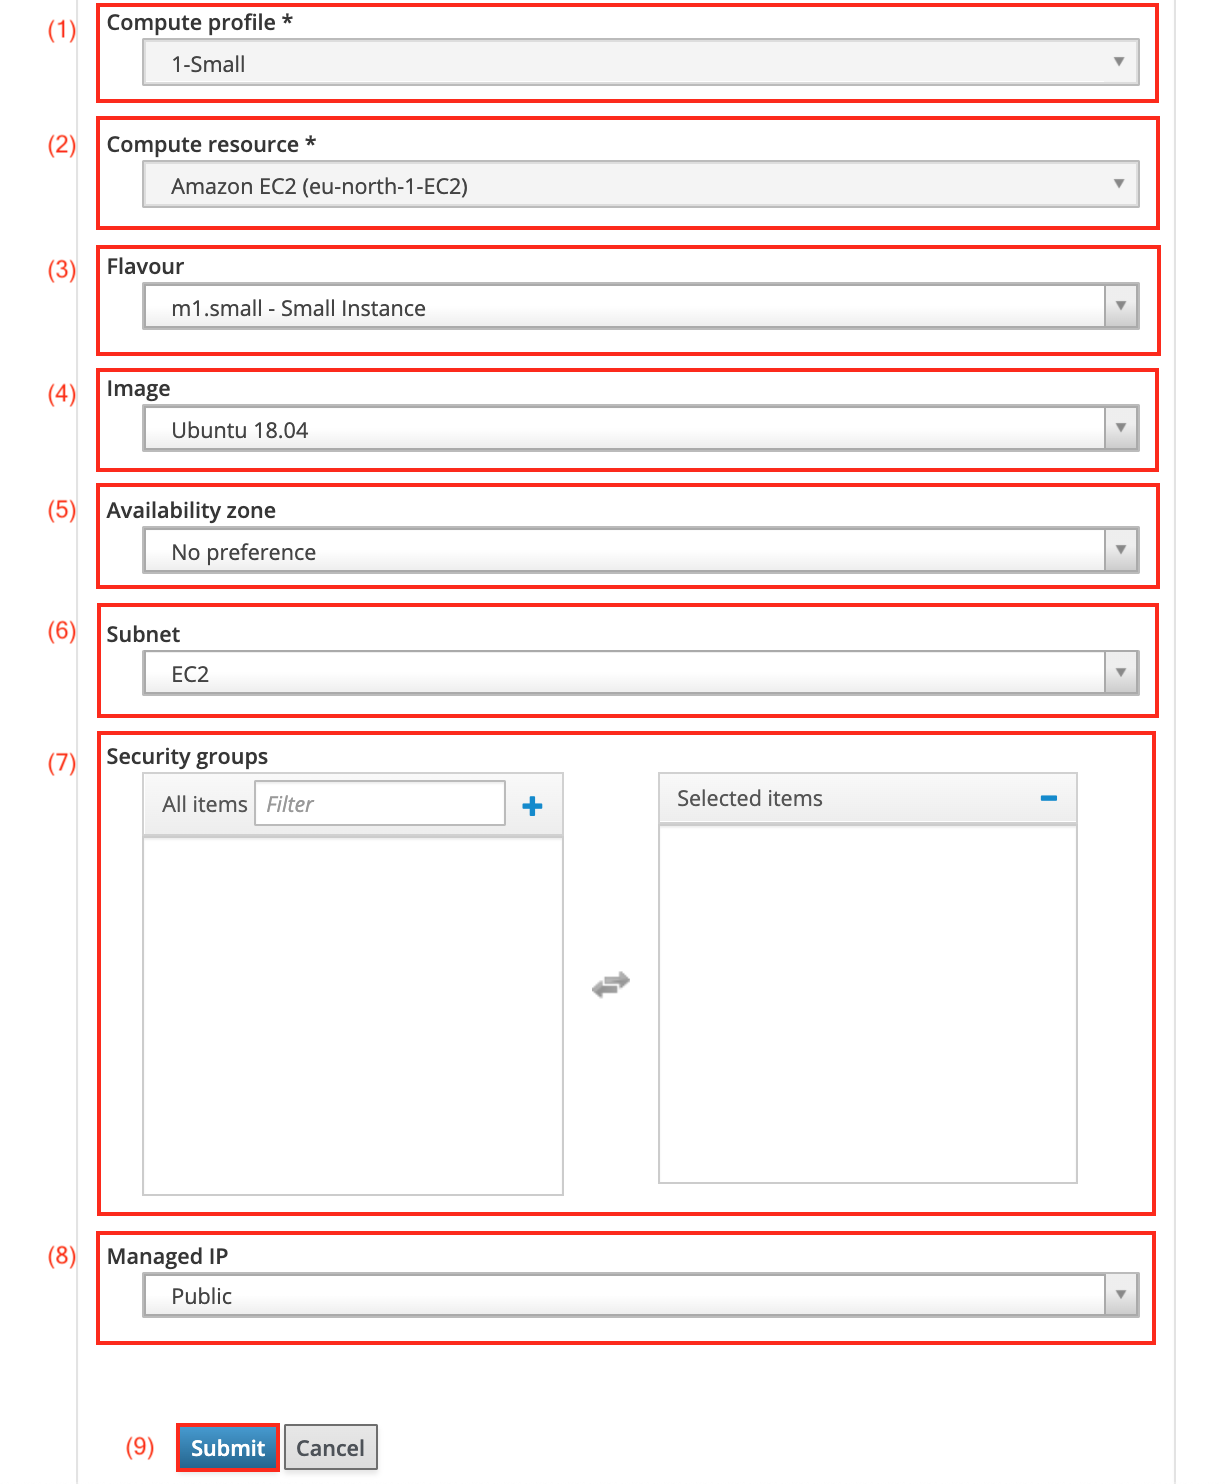
-
The selected compute profile will be displayed in the Compute profile drop down menu (1). This cannot be changed.
-
The selected compute resource will be displayed in the Compute resource drop down menu (2). This cannot be changed.
-
The Flavour (3) refers to EC2 specific options regarding the resources of hosts. Amazon offers various options including instances with high memory, lots of storage, or many CPU cores.
-
The Image (4) refers to the created image for the EC2 compute resource.
-
You may set a geographical preference in the Availability Zone drop down menu (5).
-
The Subnet drop down menu (6) allows you to set a default subnet for new hosts being created using this compute profile.
-
You may optionally add Security groups (7) to the compute profile. They can be added by clicking their name in the left column.
-
The Managed IP drop down menu (8) allows you to set a public or private IP address.
-
Remember to click the Submit button (9) to save your changes to orcharhino.