Google GCE
GCE is a cloud computing service by Google. It is one of the compute resource providers supported by orcharhino.
Installing GCE
Run the following command on your orcharhino to attach the GCE compute resource provider to orcharhino:
# foreman-installer --enable-foreman-compute-gceThis will automatically restart the orcharhino services.
Go to Administer > About and select the compute resources tab in the orcharhino management UI to verify the installation of the GCE compute resource plugin.
You need to import the gce_key.json file to connect the Google GCE securely to orcharhino.
This requires a one time SSH connection from your local machine to the orcharhino.
Run the following command on your local machine to copy the file to the orcharhino:
# scp gce_key.json root@orcharhino.example.com:/usr/share/foreman/gce_key.jsonNext, make the file accessible for orcharhino. To do so, run the following three commands on your orcharhino:
# chown foreman /usr/share/foreman/gce_key.json
# chmod 0600 /usr/share/foreman/gce_key.json
# restorecon -vv /usr/share/foreman/gce_key.json
Creating a GCE Compute Resource
The create compute resource page can be accessed via the Create Compute Resource button:
Infrastructure > Compute resources >> Create Compute Resource
|
Clicking the Create Compute Resource button does not actually create a new compute resource, rather it serves to attach a preexisting compute resource to the list of known compute resources to orcharhino. |
When adding a compute resource provider to orcharhino, you must provide a name, select the relevant provider, and enter provider specific connection details.
Enter the following information to add GCE as a compute resource provider:

-
The Compute Resource tab (1) collects all information necessary to attach GCE as a compute resource provider to orcharhino.
-
The Name field (2) displays the name of the compute resource provider.
-
Select Google from the Provider (3) drop down menu. Now, Google GCE specific additional provider fields appear.
-
You may also add an arbitrary Description (4) to your compute resource.
-
The Google Project ID (5) is a unique identifier and can be created within your Google GCE account.
-
The Client Email (6) can be obtained from within your Google GCE account.
-
The Certificate Path (7) points to the
gce_key.jsonfile that has been imported to your orcharhino as detailed above. -
You can verify your input by clicking the Test Connection button (8). orcharhino will signal if a connection to GCE with the information you provided was successful.
-
Click the Submit (9) button to save your GCE configuration to orcharhino.
-
Remember to assign a Location and Organization (10) context on the corresponding tabs.
Editing a GCE Compute Resource
The edit compute resource page can be accessed via the list of compute resources:
Infrastructure > Compute resources >> list of compute resources > Actions column > Edit
The edit compute resource page is essentially the same as the create compute resource page, with the difference that fields will be prefilled with the settings of the compute resource being edited.
Viewing a GCE Compute Resource

-
The Associate VMs button (1) will reassociate hosts that exist in a disassociated state. This mostly happens when hosts are manually disassociated via the all hosts page.
-
The Edit button (2) takes you to the edit compute resource page for the compute resource being viewed.
-
The Create Image button (3) takes you to the create compute resource image page.
-
The Compute Resource tab (4) shows some basic information about the compute resource in question.
-
You can view general details of the selected compute resource in a table (5).
-
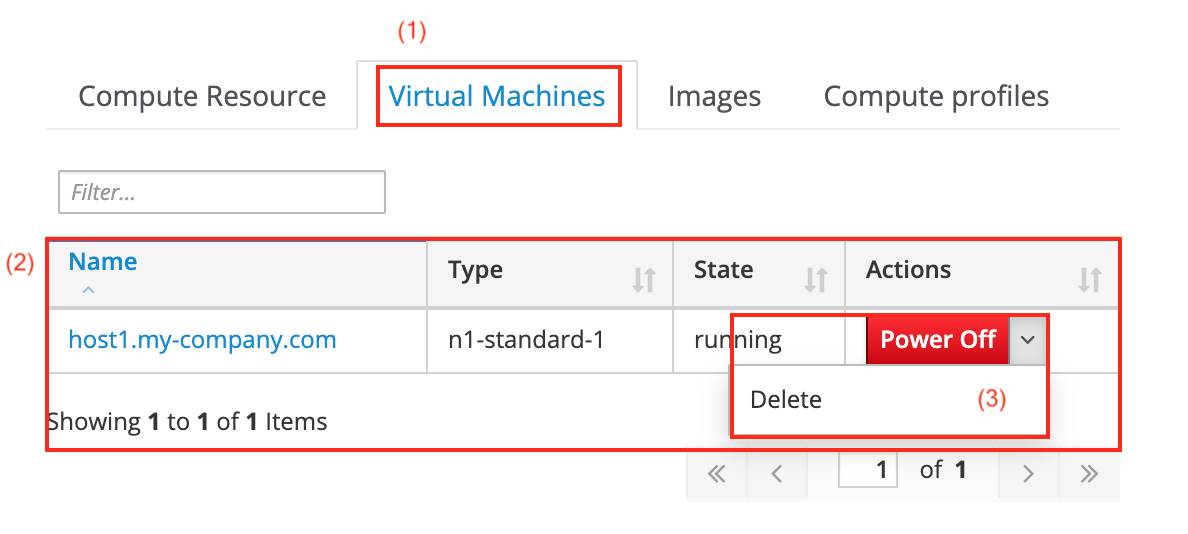
Selecting the Virtual Machines tab (1) displays all virtual machines running on the selected GCE compute resource provider, irrespective of whether they are associated with an orcharhino host or not.
-
A table (2) lists all machines by name with additional information such as type and state.
-
Selecting Power Off or Power On in the Actions column (3) will change the power state of the virtual machine in question. Click Delete to delete the virtual machine in question.
-
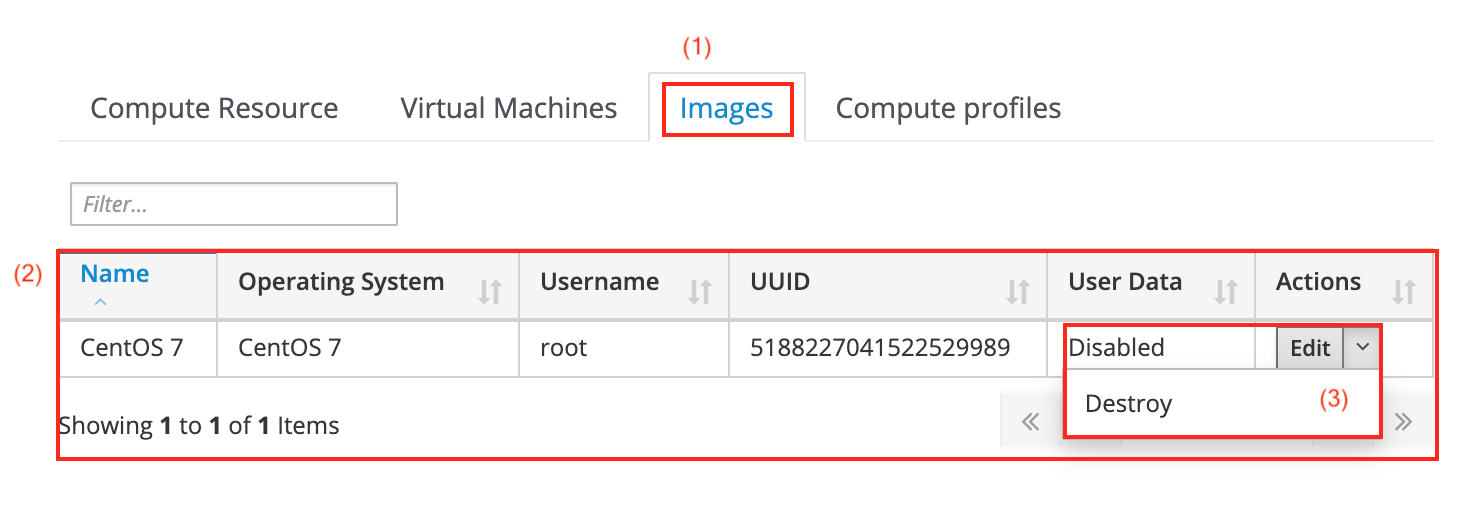
Navigating to the Images tab (1) takes you to the list of GCE images.
-
The list of images (2) contains the name and operating system amongst other information.
-
The Actions menu (3) lets you edit and destroy images from orcharhino, but not from the underlying hypervisor.
-
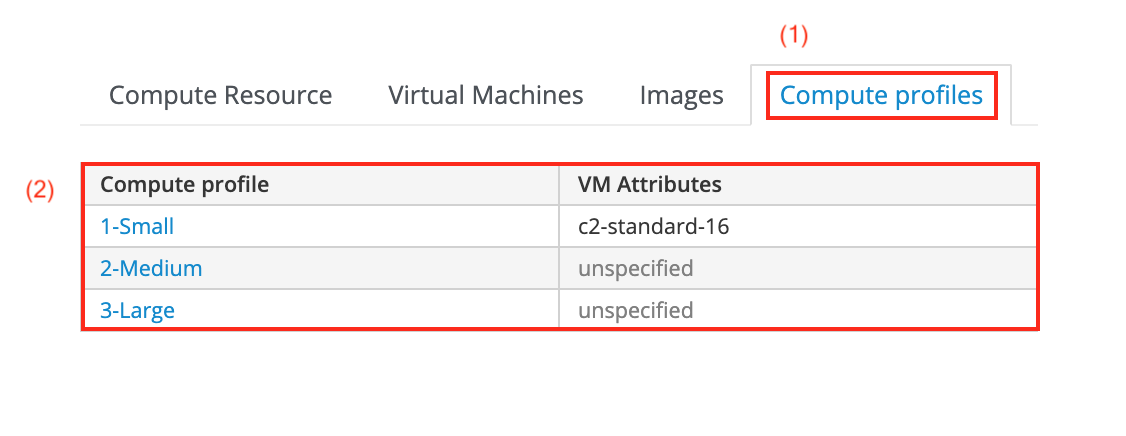
Selecting the Compute profiles tab (1) lists all available compute profiles for GCE.
-
The table (2) displays the names of existing compute profiles for GCE and the corresponding virtual machine attributes, which are unspecified for medium and large in the screenshot above.
Viewing a GCE Virtual Machine
The virtual machine overview page can be accessed via the Virtual Machines tab on the compute resource overview page running the virtual machine:
Infrastructure > Compute resources >> list of compute resources > name of a compute resource > Virtual Machines tab > name of a virtual machine
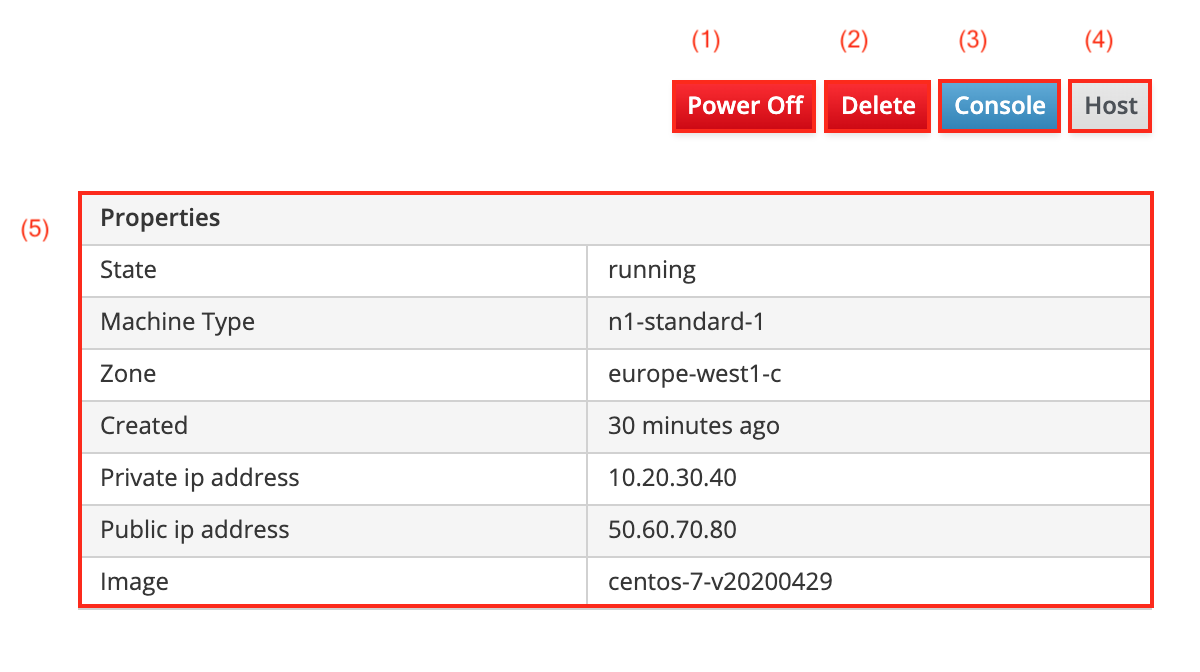
The virtual machine overview page displays information about the relevant virtual machine and includes a number of buttons to perform actions relating to it:
-
The Power Off button (1), or, for that matter, Power On button, will change the power state of the virtual machine in question.
-
The Delete button (2) will delete the virtual machine from the GCE compute resource while retaining any associated orcharhino hosts. If you want to delete the orphaned host, navigate to Hosts > All Hosts and delete the host manually.
-
Click the Console button (3) to display a read only console output.
-
Click the Host button (4) to go to the host overview page.
-
The list of Properties (5) displays various properties such as machine type and public IP address.
Creating a GCE Image
The create image page can be accessed via the compute resource overview page:
Infrastructure > Compute resources >> list of compute resources > name of a compute resource > Create Image button
The create image page looks as follows:
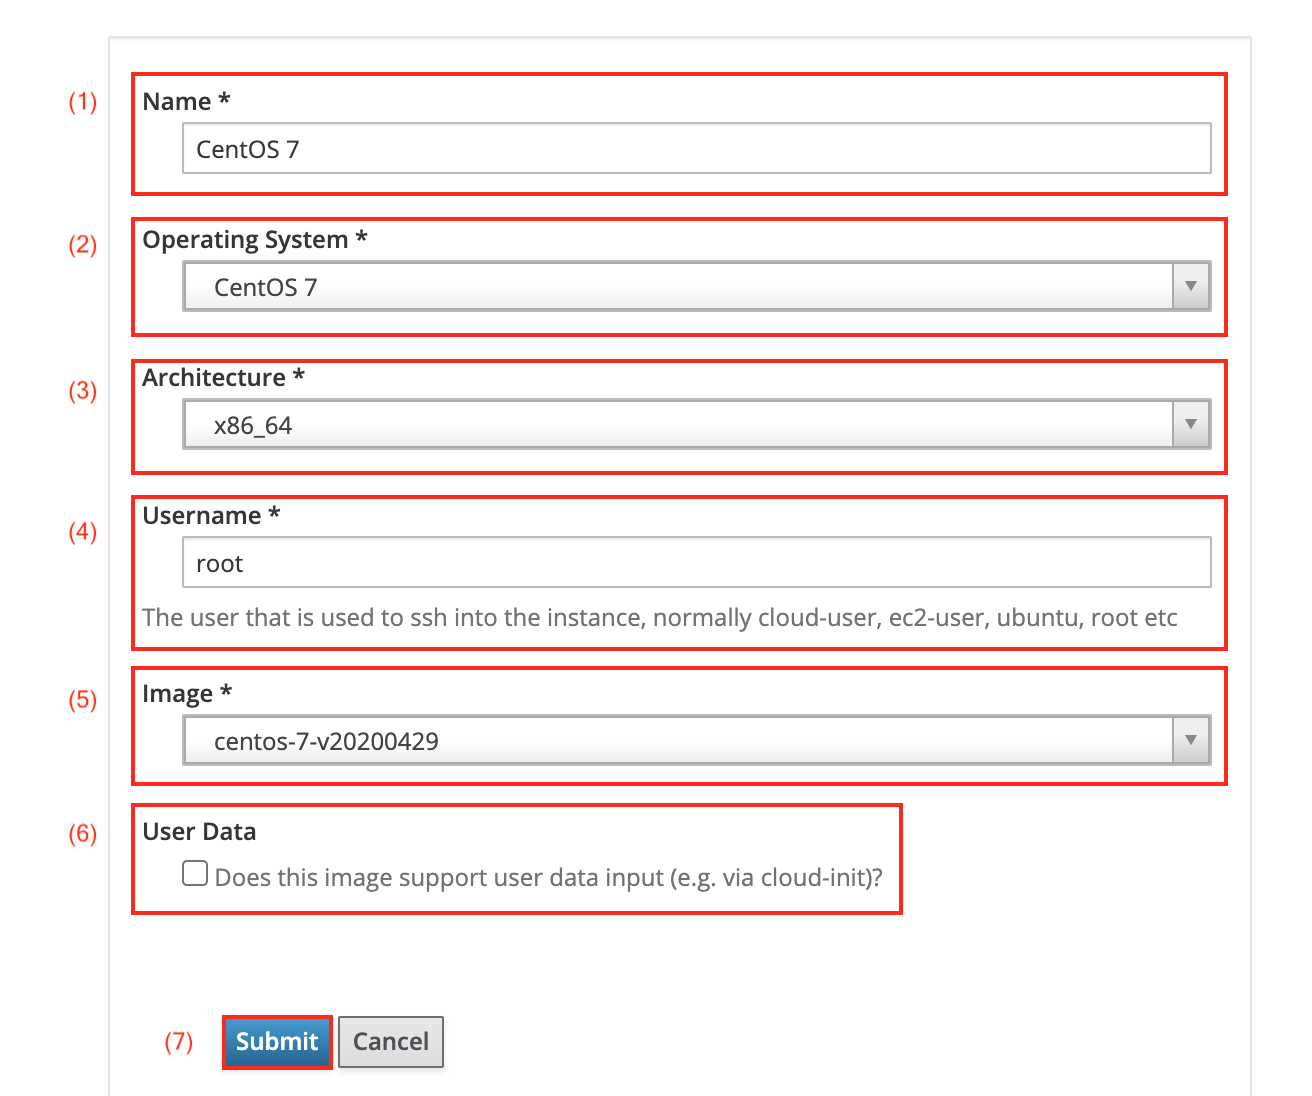
-
The Name (1) field lets you assign a meaningful and unique name, that is describing the kind of host that is to be provisioned from the image.
-
The Operating System drop down menu (2) lets you associate the image to an orcharhino operating system.
-
Associate the correct architecture of the image to orcharhino in the Architecture drop down menu (3).
-
The Username field (4) refers to the user needed to SSH into the machine. The default user name is
root. This is only necessary if the image has an inbuilt user account. -
Enter the correct Image (5) from the drop down menu to specify the name of the GCE image.
-
You may enable support for user data input by checking the User Data checkbox (6). This is required for provisioning purposes.
-
Click the Submit (7) button to save your changes to orcharhino.
Ensure the operating system and architecture fields match the operating system and architecture found in the template being created.
Editing a GCE Image
The edit image page can be accessed via the Images tab on the compute resource overview page:
Infrastructure > Compute resources >> list of compute resources > name of a compute resource > Images tab > Actions column > Edit
The edit image page is essentially the same as the creating an image page, with the difference that fields will be prefilled with the settings of the image being edited.
Editing a GCE Compute Profile
The edit compute profile page can be accessed via the list of compute profiles:
Infrastructure > Compute profiles >> list of compute profiles > name of a compute profile
This page displays a list of compute attribute sets, one for each compute resource known to orcharhino:
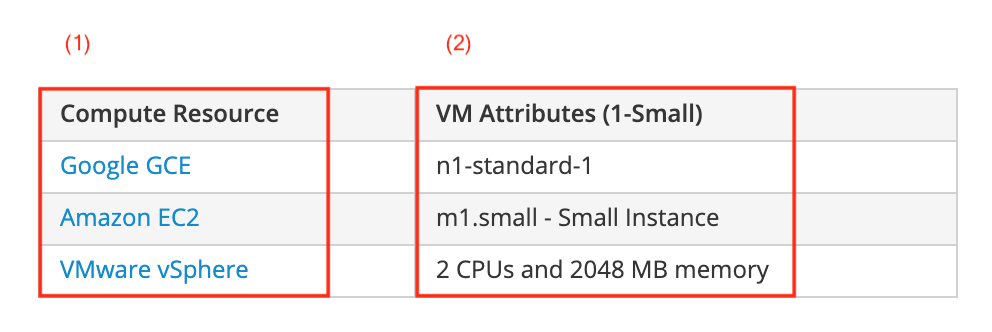
-
The Compute Resource column (1) lists all available compute resource providers.
-
The VM Attributes (1-Small) column (2) lists various attributes for virtual machines of type 1-small. The example shown above assigned GCE’s type n1-standard-1 to the 1-small compute profile.
Clicking on the name of a compute resource in the left column opens the edit compute attributes page for that compute resource:
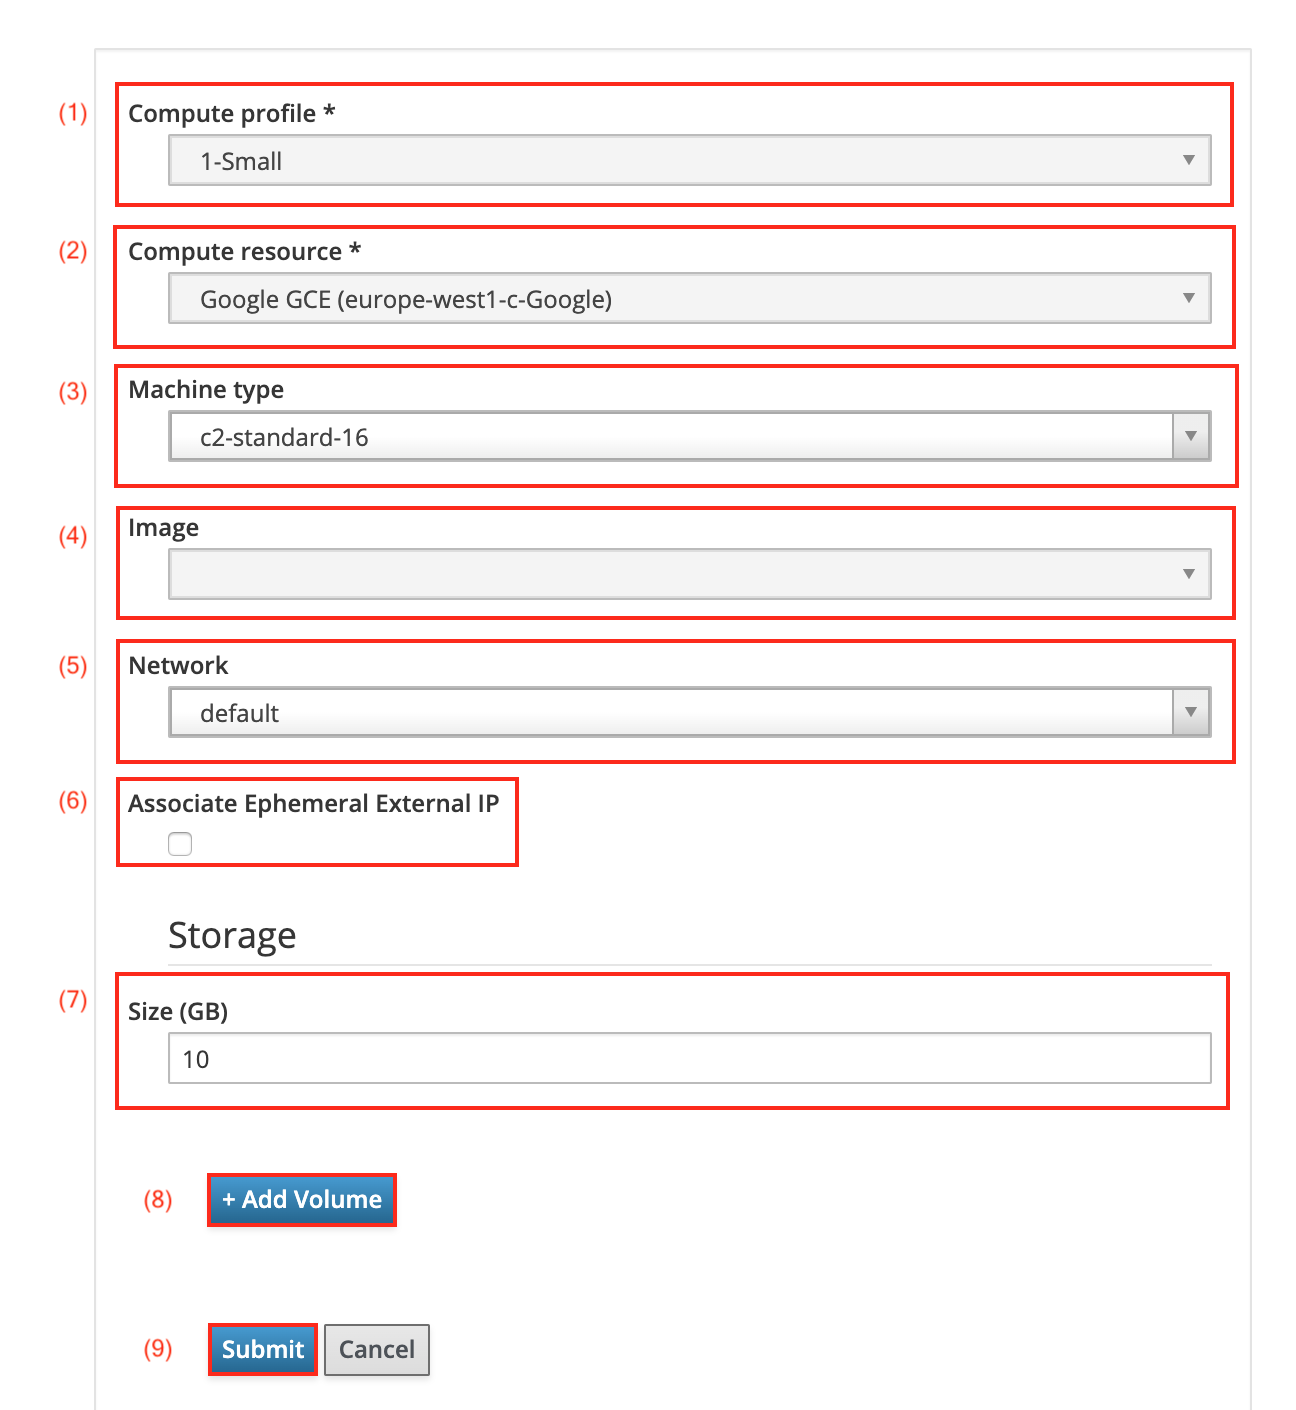
-
The selected compute profile will show in the Compute Profile drop down menu (1). This cannot be changed.
-
The selected compute resource provider will show in the Compute resource drop down menu (2). This cannot be changed.
-
The Machine type drop down menu (3) allows you to select the type of virtual machine that is to be deployed with the selected compute profile. Google offers various types including different CPU, memory, and disk options.
Ensure to select a machine type that is actually available to your Google GCE account. Not all displayed machine types are enabled by default in your Google GCE account.
-
Click the Image drop down menu (4) to select an image. This will be the basis of hosts being created with this compute profile.
-
The Network drop down menu (5) allows you to select the default network.
-
The Associate Ephemeral External IP checkbox (6) allows for temporary IP addresses.
-
The Storage field (7) allows you to define the default storage size in GiB. GCE requires hosts to have at least 20 GiB of storage space.
-
Click the Add Volume button (8) to add another storage volume.
-
Remember to click the Submit button (9) to save your changes to orcharhino.