Managing ISO images
You can use orcharhino to store ISO images, either from Red Hat’s Content Delivery Network or other sources. You can also upload other files, such as virtual machine images, and publish them in repositories.
Importing individual ISO images and files
Use this procedure to manually import ISO content and other files to orcharhino Server. To import files, you can complete the following steps in the orcharhino management UI or using the Hammer CLI. However, if the size of the file that you want to upload is larger than 15 MB, you must use the Hammer CLI to upload it to a repository.
To use the CLI instead of the orcharhino management UI, see the CLI procedure.
-
In the orcharhino management UI, navigate to Content > Products and click Create Product.
-
In the Name field, enter a name to identify the product. This name populates the Label field.
-
Optional: In the GPG Key field, enter a GPG Key for the product.
-
Optional: From the Sync Plan list, select a synchronization plan for the product.
-
Optional: In the Description field, enter a description of the product.
-
Click Save.
-
In the Products window, click the new product and then click Create Repository.
-
In the Name field, enter a name for the repository. This automatically populates the Label field.
-
From the Type list, select file.
-
In the Upstream URL field, enter the URL of the registry to use as a source. Add a corresponding user name and password in the Upstream Username and Upstream Password fields.
-
Click Save.
-
Select the new repository.
-
Navigate to Upload File and click Browse.
-
Select the
.isofile and click Upload.
-
Create the product:
$ hammer product create \ --name "My_ISOs" \ --sync-plan "Example Plan" \ --description "My_Product" \ --organization "My_Organization" -
Create the repository:
$ hammer repository create \ --name "My_ISOs" \ --content-type "file" \ --product "My_Product" \ --organization "My_Organization" -
Upload the ISO file to the repository:
$ hammer repository upload-content \
--path ~/bootdisk.iso \
--id repo_ID \
--organization "My_Organization"
Preparing Offline Installation Media for Oracle Linux 10
This procedure describes how to add installation media for Oracle Linux.
-
You have selected at least one Oracle Linux variant from the list of operating systems during step four of the main installation steps.
-
You have obtained the
.isofiles for Oracle Linux. -
You have created the necessary operating system entries in orcharhino.
Navigate to Hosts > Installation Media and ensure there are already entries for Oracle Linux 10.
-
Copy the Oracle Linux
.isofile to your orcharhino Server:$ scp oracle_linux.iso root@orcharhino.example.com:/tmp/ -
Create the directory for your Oracle Linux medium:
$ mkdir -p /var/www/html/pub/installation_media/oracle_linux/ -
Extract the Oracle Linux
.isofile to the newly created directory:-
Install
p7zip:$ dnf install p7zip p7zip-plugins -
Extract the
.isofile:$ 7z x /tmp/oracle_linux.iso -o /var/www/html/pub/installation_media/Oracle Linux/ -
Ensure the permissions of your extracted files allow the
apacheuser to read them:$ chmod -R go+X+r /var/www/html/pub/installation_media/oracle_linux/*
-
-
Optional: Navigate to
http://orcharhino.example.com/pub/installation_media/to ensure the extracted files are available. -
Optional: Remove the Oracle Linux
.isofile from your orcharhino Server.
|
Alternatively, you can also host the content of the |
Setting Up Installation Media for Oracle Linux 9
Adjust the repository paths of the installation medium for Oracle Linux 9.
-
In the orcharhino management UI, navigate to Hosts > Installation Media.
-
Select your installation medium for Oracle Linux 9.
-
Enter the Path to the
BaseOSdirectory within the extracted installation medium. -
Click Submit to save your change.
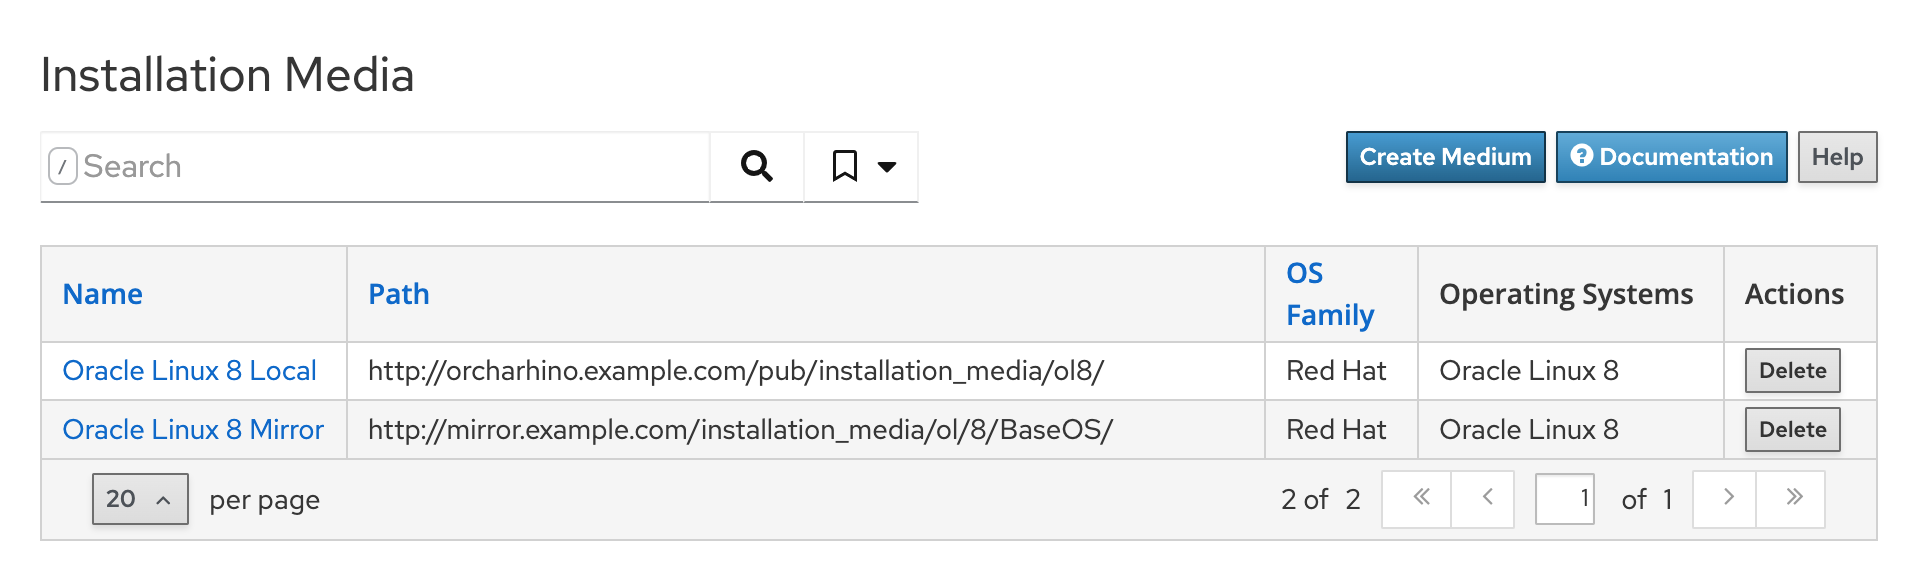
Setting Up Installation Media for Oracle Linux 8
Adjust the repository paths of the installation medium for Oracle Linux 8.
-
In the orcharhino management UI, navigate to Hosts > Installation Media.
-
Select your installation medium for Oracle Linux 8.
-
Enter the Path to the
BaseOSdirectory within the extracted installation medium. -
Click Submit to save your change.
-
Navigate to Hosts > Operating Systems.
-
Select your operating system entry for Oracle linux 8.
-
On the Parameters tab, enter the path to the
AppStreamrepository within the extracted installation medium. Set the variableadditional_mediaas typestringwith the value[{"url": "http://orcharhino.example.com/pub/installation_media/ol/8/AppStream/", "name": "AppStream"}]. -
On your orcharhino Server, create a symbolic link in the
/BaseOSpath for this version:$ cd /var/www/html/pub/installation_media/ol/8/BaseOS $ ln -s ../imagesThis is required for orcharhino to find the kernel and initrd files which are used for network based installations of hosts running Oracle Linux 8.
|
The text and illustrations on this page are licensed by ATIX AG under a Creative Commons Attribution Share Alike 4.0 International ("CC BY-SA 4.0") license. This page also contains text from the official Foreman documentation which uses the same license ("CC BY-SA 4.0"). |